Amazing Diet Recipe: Fudge Banana Muffins (with Hidden Spinach or Kale!)

18 Jan

(Jamie devoured these, never suspecting Mom had hidden real nutrition inside. Score!)

Lately, I’ve been on a greens kick. After discovering I could puree spinach and kale into my smoothies without affecting the taste, I started experimenting with hidden, pureed greens in EVERYTHING. And you know what? It totally works.

We’re going through at least TWO giant bags of fresh greens per week at my house without my kids knowing they’ve eaten even a single bite of the stuff! In fact, Jamie will swear up and down he hates spinach and kale, when in fact, he eats it daily without knowing.

Meanwhile, not a single Ritter has gotten sick this entire winter. Coincidence? You decide.

The trick, I’m learning, is to sneak pureed Superfoods into recipes that will mask the green tint. Thus, cocoa powder is my new best friend.

When I mentioned experimenting with these cocoa-banana muffins on Facebook last weekend, one of my girlfriends read it and realized she had all the ingredients in her kitchen already and gave it a whirl as well. Within an hour or so, she’d hopped back on Facebook with a winning review of them. I decided that meant I should post the recipe here, even though I hadn’t planned to or taken instructional photos. These are SUPER easy to make, and bake quickly. Your kids will be amazed that you’re letting them eat so many, but with low sugar/fat and rich in vitamins and fiber, you’ll be smiling every time you see them cram another muffin into their pie holes.

Also, I calculated my muffins to be around 2 Weight Watchers points each (old WW points), so you can eat them all day if you want!

Here’s what you need:

  • 2 overripe (brownish) bananas
  • 2 cups whole wheat flour (regular will work, too)
  • 1 tablespoon baking powder
  • 1/2 tablespoon ground cinnamon
  • 1 (6-oz) container fat free fruit yogurt (I used Yoplait cherry lite)
  • 2/3 cup sugar
  • 1/4 cup butter
  • 2 teaspoons vanilla extract
  • 1/3 cup cocoa powder
  • about 4 loose cups of fresh spinach or kale leaves (I used both)
  • 1 egg (or equivalent egg substitute, which I used)
  • handful of miniature chocolate chips (which go way further than regular-sized)

Here’s what you do:

Preheat oven to 325 degrees and place 18 cupcake liners in muffin tins.

In a mixing bowl, combine whole wheat flour with baking powder and cinnamon; set aside.

In your blender, layer the following from the bottom up: 1.) two bananas, peeled and broken into large chunks, 2.) the spinach or kale, crammed down as far as you can, 3.) yogurt, 4.) vanilla extract, 5.) egg or egg substitute.

Puree the mixture. You may have to stop the blender once or twice to push the spinach down closer to the blade, but I assure you it will all puree into a smooth, thick green liquid with no discernible leaf bits once it’s all worked in.

Pour this mixture into the dry flour mixture and stir until evenly distributed. Add the cocoa powder and miniature chocolate chips; stir just until mixed.

Spoon the batter into muffin liners, making each about 1/2 full to get 18 muffins.

Bake about 12 minutes, or until tops are firm but inside is still soft. Pull from oven and cool in pans for 10 minutes. Transfer to airtight containers (I use large ziploc bags) as soon as they are cool enough. This will help them develop that wonderful stick-muffin-top over an hour or two. And we love sticky muffin tops.

These would probably freeze beautifully if individually wrapped, but my kids and I couldn’t keep our mitts out of them long enough to find out. They are good fresh from the oven, but oh-so-much better after they’ve been in the airtight container for a few hours. The moisture from the soft-cooked centers distributes evenly through the whole muffin and they’re just so moist and fudgy. Mm-mmm!

Quick Pumpkin & Sour Cream Cake

1 Nov

See this cake in the photo? I decided to bake that at 2 p.m. on Sunday afternoon. By a quarter till three, it was baked, cooled, frosted, and sitting in the fridge awaiting dinnertime. Do I have your attention yet?

Iโ€™d forgotten all about this easy recipe until last month, when my dear โ€œsort-of-cousin,โ€ Salina, sent me a Facebook message about it. Ever since that day, Iโ€™d been yearning for an opportunity to revisit the recipe and make some small recipe experiments.

Simple and sweet!

The concept is a simple one, and has appeared in numerous seasonal magazines over the years: Take a cake mix and a can of pumpkin and make a 2-ingredient cake. (Not counting spices to taste, of course.) And it actually, really, truly, amazingly works.

This is how the best cakes begin.

However, Iโ€™ve thrown in a couple of other round-the-house ingredients that help make the batter a bit smoother (the original recipe sometimes leads to the chef having to make a decision between pockets of dry cake mix or overbeaten gluten strands due to the dry nature of the batter), and also an added dimension to the flavor of delicious pumpkin. You can try it my way, or the original way โ€” just say youโ€™ll try it! :)

Youโ€™ll need:

  • 1 regular boxed white cake mix
  • 1 (15-ounce) can of solid-pack pumpkin (not โ€œpumpkin pie fillingโ€)
  • 3/4 cup (6 ounces) sour cream
  • 1 tablespoon lemon juice
  • 1/2 cup water
  • your favorite autumn spice blend (I used 2 tsp cinnamon, 1 tsp nutmeg, and 1 tsp ginger)

What you do:

Stir well before adding the liquid.

Preheat the oven to 325 degrees. Prepare two 8โ€ณ- or 9โ€ณ-round cake pans. I prepare mine by first cutting parchment paper rounds to fit in the bottom, then spraying the naked pan down with Bakerโ€™s Joy (flour/grease spray all-in-one), placing the parchment in the bottom, spraying again, placing a #7 flower nail inverted in the bottom, spraying the nail down, and then pouring in the batter. This eliminates crusty cake bottoms, overly-domed layers, and unevenly cooked middles. Hooray!

The liquid will make it creamier, but you should still expect a somewhat stiff batter. Don’t worry. It’ll be perfect.

In a large mixing bowl (you can do this one by hand), dump the dry cake mix, pumpkin puree, sour cream, and spices. Mix with a spoon until mostly blended. Youโ€™ll notice pockets of dry mix, and the batter will be much stiffer than regular beaten, wet cake batter. Thatโ€™s perfectly okay.

Heehee! I love how Ollie ran through while the timer was preparing for the photo and managed to sneak into the shot. Look at that happy face! He knows what’s coming!

Once the mixture is well blended, then add your water and lemon juice. Stir just until blended and divide batter into your two prepared cake pans. Bake for 20-25 minutes, or until top is firm when pressed. Donโ€™t let it go until itโ€™s browning; the color wonโ€™t really change while itโ€™s in the oven so just pull it when the top feels springy.

Cool on wire racks. You can turn the cakes out of the pan about a minute after they come out of the oven โ€” the cake is very dense so itโ€™ll hold together, and you can cool them faster that way by sticking them in the freezer for a few minutes while cold air circulates around them. Theyโ€™ll be frost-able within ten minutes.

The frosting nail will easily pop right out of the cake, leaving a perfectly-baked center behind. Ta-dah!

I whipped up some fast Better-Than-Buttercream Frosting while the cake was baking, but you can just as easily sprinkle with powdered sugar and cinnamon. Thereโ€™s certainly enough sweetness and flavor to stand alone.

Alternately, you can always serve it with Ginger Cream Cheese Frosting or even something (gasp!) out of a can for speedโ€™s sake. This recipe does equally well as little bald muffins.

A giant basketweave tip and thin spatula make frosting layer cakes a one-minute project! Just pipe & smooth!

I like this cake the best served straight out of a chilly fridge, but you can keep it on the countertop just as easily if you prefer a room temp cake.

I love the color of this cake. Mmmm!

Itโ€™s so easy and versatile, Iโ€™m confident youโ€™ll be pleased no matter what!

Sending your kids out to fly a kite gives you just enough time to stick a cake in the oven!


Throwing mini chocolate chips on the top saves you the effort of smoothing frosting.


Cheap Recipe: Cheddar, Sour Cream & Onion Ruffle Meatloaf

18 Oct
(Sigh.) Is there anything better?

Decadent Recipe: Whoopie Pies

9 Aug

Clever Dessert Gift Recipe: Baked Neopolitan Cheesecake in Mason Jars

26 Jul

A month or two ago, I had the opportunity to meet up with some of my old girlfriends, Rheannon and Melissa, whom I never get to see anymore. We’ve all become mothers in the last few years, so we decided to have a playdate among the little ones and enjoy a chance to catch up with one another over some delicious food.

As per usual, everyone else’s babies played happily while mine threw an enormous tantrum. On the other hand, I still like this photo of Ollie because even his clothes have a sort of Neopolitan look to them that supports the dessert we brought. We Ritters are nothing if not coordinated.

Because both of my friends are also clever kitchen bloggers, I wanted to bring something they hadn’t encountered before. Inspired by all of the Mason jar cheesecakes cropping up everywhere — but looking to avoid the overabundance of “no-bakes” out there in InternetLand — I settled on this design, which takes elements from this blogger’s baked version but incorporates three different flavor tiers, reminiscent of childhood days spent eating Neapolitan-flavored ice cream. (This was, after all, a play date for two generations.)

The baked, finished jars were adorable, each with a crumbled Oreo bottom, layers of chocolate, vanilla bean, and raspberry cheesecake filling, and red raspberry pie filling to top it all off.

I had absolutely no issues baking them right in the jars (using a water bath in the oven), and was able to get a dozen 8-ounce jars from a single batch, so I took some to work as well. They transport SO much more easily than cakes, cupcakes, pies or anything else I’ve driven to work and juggled up the stairs in the past.

I can’t say enough good things about how these came out, so I’ll just cut myself off here and tell you how to make them.

Here’s what you’ll need:

  • 12 (8-ounce each) half-pint Mason Jars, sanitized and dried, with accompanying lids/rings/hardware.
  • 12-15 Oreo cookies, crumbled into chunks (I used the fudge-filled variety, but it really doesn’t matter.)
  • 5 (8-oz. each) packages cream cheese, room temperature
  • 1-1/2 cups granulated sugar
  • 6 eggs, room temperature
  • 1/4 cup milk
  • 3 tablespoons all-purpose flour
  • 1 tablespoon vanilla extract
  • 1 (10- to 14-ounce) can raspberry pie filling (you will probably not use entire can)
  • enough water to mostly fill a 9×13 metal pan
Additional ingredients for the chocolate filling layer:
  • 1/4 cup granulated sugar
  • 1/4 cup cocoa powder
Additional ingredients for the vanilla bean filling layer:
  • scraped seeds from 1 vanilla bean or equivalent amount of vanilla bean paste
  • 1/4 teaspoon cinnamon
Additional ingredient for the raspberry filling layer:
  • 1/3 cup seedless black raspberry jam (can substitute other seedless flavor like strawberry if desired)

Prepare the Jars:


The crumbled Oreos don’t have to be *too* crumbled…

Begin by separating 12 half-pint-sized (8-ounce) jars from their lids and rings. If you haven’t already, sanitize them and make sure insides are well-dried.

In a large bowl, crush the Oreo cookies into medium-sized chunks. Place a large spoonful of cookie crumbles in the bottom of each jar, just covering the bottom of the glass.

Have a 9×13 metal pan with 2″ sides or taller at the ready on your countertop. This is what you will bake the jars in, surrounded by water.

Prepare the Filling:

Use an electric mixer to whip the 5 packages of room-temperature cream cheese until smooth and creamy. Slowly beat in 1-1/2 cups of the granulated sugar until evenly mixed.

This recipe makes a LOT of batter, so be ready for it!

Using a separate bowl and wire egg whisk, beat the 6 eggs until yolks and whites run together a little bit. (You can do this by hand; it doesn’t take very long.) Add the milk, flour and vanilla extract to the egg mixture and use the whisk to lightly incorporate everything.

Using the “stir” setting on mixer, gradually pour the egg mixture into the cream cheese mixture; once it is mostly incorporated you can raise the beater speed until the batter is smooth.

Take two large mixing bowls and pour about 1/3 of the mixture into each of them, leaving 1/3 in the original mixing bowl.


You should have three separate bowls of flavored filling, each more amazing than the last. Actually, that’s a lie. The raspberry is hands-down the most amazing. Just pretend I didn’t say that, though.

Scrape the sides with a rubber spatula as you do this to make sure no cheese lumps are left in there.

To the first bowl, add 1/4 cup cocoa powder and 1/4 cup additional granulated sugar.

To the second bowl, add the scrapings of one vanilla bean (or equivalent substitute) and 1/4 teaspoon ground cinnamon.

For the third bowl, microwave 1/3 cup seedless blackberry jam in a measuring cup for about 30 seconds. Stir until smooth and add to the third bowl of cheese filling. If the final stirred product looks a little bit too purple, you can add a couple of drops of pink food coloring. I kind of liked the purplish-pink look, so I left it as-is. ๐Ÿ™‚

Layer the Jars:

Preheat the oven to 325 at this point because it will still take you a little while to complete this process. You will also want to begin boiling a kettle full of water at this point. Once boil is reached, remove from heat even if you’re not quite done assembling the jars. It will still be warm enough for what you need in a few minutes.

Chocolate batter goes in first…(I think I added a little too much to this one.)

Add a few spoonfuls of chocolate batter to each jar over the cookie crumbles. Don’t add too much, though, because you’ve still got several layers to go.


Make sure to eliminate these batter streaks before adding the next layer so the finished jars won’t look sloppy.

It helps to have a folded, clean dishtowel on the countertop to rap the jar up and down a little bit on to get mixture to settle without breaking the jar on the hard counter.

Chef’s Note: Make sure there are no streaks of chocolate filling on the jar sides above that layer. If there are, you can run a clean napkin around the inside of the jar to take most of it away.

Repeat this process with the vanilla filling layer, being sure you are barely over the halfway mark of the jar with filling.

Add the vanilla layer…you’ll notice that the ground cinnamon helps to mimic the look of vanilla beans, making it look even more vanilla-streaked that it is. (So fancy.)

(The batter is probably going to rise slightly or shift while in the oven, and you will also need to conserve the upper-rim area for the pie filling so that all three actual cheesecake layers are visible even when lids/rings are in place later.)

Again, wipe any higher-than-vanilla-layer filling away from jar sides.


Gorgeous. Just gorgeous.

Repeat this process again with the raspberry filling layer. You should now beย  almost to the top of the regular jar part; rim area unfilled.

Some air bubbles may rise to the surface as you fill the jars. You can pop them with a toothpick if it’s easy to do, but don’t stress about it too much.

Bake the Jars:

As you complete the raspberry layer for each jar, place the jar into the 9×13″ metal cake pan, making rows. Once all 12 jars have been filled and transferred to the pan, you can slowly begin pouring the hot water from the teakettle into the pan (surrounding the jars). This is easiest to do from one corner of the pan.

Don’t stress too much about the air bubbles. Just pop ’em when you can.

Be patient and careful when adding the heated water; you don’t want any of the jars to overheat too quickly and crack. The entire purpose of using very hot water here is to prepare them for an easy transition into the hot oven, so…slowly, gradually, methodically is how you want to temper the glass.


All watered up and ready for the oven…

Once the water is about 2/3 way up the sides (or no higher than you feel comfortable lifting), put on your oven mitts and carefully transfer the water-and-jar-filled pan into the preheated oven and. Position pan on the center rack and close the oven door, and reduce heat to 300 degrees.

Bake jars for 30 minutes, avoiding opening the oven door unless absolutely necessary. At the end of 30 minutes, turn the oven off, but leave jar pan inside oven for another 20 minutes or so. If it’s not hot in your kitchen, you can prop the oven door open after 15 minutes like this.

See how the filling rose upward a little bit? Just mash it back down with the back of a spoon while it’s still hot.

When you remove the pan from the oven, you’ll see that the filling has probably risen up to the surface of the jar mouth on each one. Once out of the oven, you should be able to use a fingertip or the back of a spoon to tap the filling back down to the bottom of the rim area.

Spoon raspberry pie filling into each jar, filling most of the rim area with it while cheesecake is still hot. Add the lids and rims to the jars. As they cool, you might even hear some of them do that fun “plink!” that regular jars* do when you’re canning other items.

*Because you’ll be using these within the next several days regardless of that plinking seal, it doesn’t really matter if they all seal like that. (I just think it’s extra-cool when they do.)


Oh, yeah.

Once your jars have finished cooling, decorate lids with ribbons or fabric if desired and transfer to the fridge. It helps if you saved the 12-hole box your jars originally came in. Never throw those away, ever! They are like gold bullion to frequent canners. ๐Ÿ™‚

Happiness in a jar.

Deliver your jarred cheesecakes to family and friends, and have your most sincerely modest facial expression at the ready, because you’re about to receive a lot of compliments.

Kid-Friendly Recipe: Pasta with Browned Butter

22 Jul

This is the best thing there is. Period. End of discussion.

Grace’s hippie sister here, popping in with a quick, kid-friendly recipe.

Remember when you were little, and you hated spaghetti sauce, so you’d bug the crap out of your mom to get her to let you eat noodles with butter and Parmesan cheese instead? Yeah, our mom wouldn’t let us do that very often, either. Most of my adult life has revolved around doing crap Mom wouldn’t let me do when I was little.

The whole skip-the-sauce-and-go-straight-for-the-noodles thing gained an air of legitimacy about 10 years ago, when I had my first encounter with the Old Spaghetti Factory’s awesome spaghetti with browned butter and mizithra cheese, which — the menu assured us — was a great favorite of Homer (the blind poet from ancient Greece, not the fat guy from The Simpsons) while he was writing The Odyssey. As an English teacher, I considered this complete justification for eating as much of the stuff as I wanted.

I was pretty amped when the Old Spaghetti Factory decided to share its recipe for this awesomeness in the Riverfront Times’ annual cookbook. I was even more amped when I found out how ridiculously easy it was to make.

This is the part you throw away. Unless you're me, in which case you savor its salty, buttery goodness while nobody's looking.

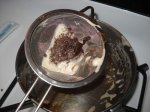
Start your pasta. I like capellini because it cooks fast and has a nice texture, but a fatter pasta will work just as well. While the pasta cooks, melt a stick of butter — realbutter, not margarine or “I Can’t Believe It’s Not Toxic Waste” or whatever else you’ve got — over low heat. Stirring constantly, bring the butter to a boil. It will froth and bubble and do all kinds of outrageous things. Just keep stirring until it settles down, takes on an amber color, and smells like heaven. At this point, remove it from the heat and pour it through a strainer to remove any scorched solids. (Have you ever eaten browned butter residue out of a strainer? If not, then, uh, I haven’t either.)

Cheese + butter = awesome.

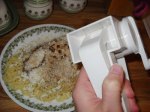
Drain your pasta, top with embarrassing amounts of grated cheese — the restaurant uses mizithra, a Greek cheese made from sheep’s milk that tastes better than anything else on the planet, but Parmesan will work just fine in a pinch — and drizzle with the browned butter. One stick of butter makes two servings. Unless you’re me, in which case, we’re going to need a bigger boat.

Guest Post: Easy Homemade Baby Food

21 Jul
An easy and inexpensive option is freezing puree in ice trays and then transferring to labeled zipper bags.

Seasonal Recipe: Homemade Salsa

20 Jul

Snack of champions: chips and homemade salsa.

Grace’s hippie sister, Emily, here, surfacing for the first time in months to share a recipe that should come in handy for anybody who has a vegetable garden (or a neighbor with a garden).

That’s right, kids: It’s salsa time.

Use an entire head of garlic. Seriously.

Start by throwing a big handful of cilantro (one bunch from the grocery store or whatever you have in your garden will do) into a food processor and pulsing it until it’s nice and fine and feathery. Next, take a head of garlic, separate and peel the cloves, cut off the ends, and throw ’em into the food processor. Give ’em a good whirl to mince them, then add hot peppers to taste. Four serranos will give you a nice medium-hot salsa; adjust the quantity to suit your taste, and feel free to substitute whatever peppers you prefer (or need to use up).

I like red onions, but red or yellow will work as well.

Next, add three cored, quartered bell peppers in any color and a peeled, quartered onion, processing after each addition. Add the juice of two or three small limes — proportions aren’t critical, but you want to get a little extra acid in there for canning purposes — and process to mix.

Tomatillos look like little green tomatoes with husks.

If you can put your hands on some tomatillos, peel and core about five of them and add them to the mix at this point. If you can’t, don’t worry about it; they aren’t absolutely necessary, but they do add a nice flavor if you happen to have them. Process, then dump the mixture into a large bowl to make room in the food processor for your tomatoes.

Core and quarter about three pounds of tomatoes (Romas are ideal, but any kind will do; just be aware that the juicier varieties will make a finished product that’s more like picante sauce than salsa) and chop them in the food processor.

Now, here is a neat trick: If you have extra cucumbers that you need to use up, you can add a couple to your salsa at this point, and nobody will be any the wiser. Just chop them finely and stir them in. You’ll never notice them by the time they’ve absorbed the other flavors. You could probably do this with zucchini, too, although I wouldn’t use too much, lest it compromise the texture.

Unless your food processor is huge, you'll have to do half the tomatoes at a time.

Stir everything together in a huge bowl. At this stage, the salsa will probably look kind of bubbly and unappealing. Remedy this by stirring in ground cumin until the froth goes away, then stirring in chili powder until the color looks nice and red.

Salsa cans well in a boiling-water bath.

You can either eat the salsa now or pack it into clean pint jars with an inch of headspace and process in a boiling-water bath for 15 minutes. Serve nice and cold with plenty of tortilla chips or fresh vegetables for dipping. Makes about three quarts.

I like to bring this salsa to office parties. It always impresses people, and it’s safe for vegetarians, diabetics, and various other dieters, especially if you bring celery sticks and cucumber slices for low-carb dipping.

Lots of new posts on their way!

20 Jul

Hello again, friends!

Boy, have I missed this place. For those of you who don’t know, I have spent the summer as a re-enrolled college student. I’ve been struggling with my first math class in a decade, and am currently pulling a 92% with 2.5 weeks to go. (Hoorah!)

Because the Red Kitchen has the greatest blog community ever, you’ll soon be enjoying some wonderful guest recipe posts sent in by loyal RKP readers. Also thanks to the terrific support of Red Kitchen followers, I’m pleased to report that RKP has been featured on the local broadcast (WSIL-TV3) morning news as one of the best blogs in Southern Illinois. I didn’t even know they *had* a feature like that going on, and awoke one morning a couple of weeks ago to congratulatory messages in my inbox. What a fantastic morning that was!

I really do love you guys. ๐Ÿ™‚ And now I’m off to publish some of these terrific guest posts! Watch your inboxes for them!

Hugs and cheap groceries for all,

–Gracie

Rubber Duckie, you’re the one…

6 May
You make bath time lots of fun…

Hi folks. Sorry I’ve been so sporadic with posts lately — it’s shower & wedding season, which means I’m busy with custom cake orders. Which is a good problem to have, especially if you like cake decorating as much as I do. ๐Ÿ™‚

I thought I’d share some photos of a recent order to keep in touch until I have time to write up the recipe posts I’ve been sitting on lately. This is a Rubber Duckie bath tub cake I created last weekend for a baby shower. Everything on the whole cake is edible. If it’s not frosted, it’s made out of marshmallow fondant. (You can find my recipe and tutorial on using marshmallow creme fondantย by clicking here.)

Thanks for hanging in there until I get back in the blogging swing again! You know I miss it. And without further ado, here are some more pics of the rubber duckies. If you have any questions on how I made something (or want to order a cake!), please leave me a comment and I’ll get right back to you. ๐Ÿ™‚

Duckie Magellan. (Fondant duckie, buttercream water swirls, sprinkle-and-food-coloring eyes, cupcake sprinkle “hair” feathers. The boat is sporting the ONLY non-edible thing in the whole cake — it is held up on the inside by a wooden toothpick. Sue me.) ๐Ÿ™‚
This one has a towel wrapped around her head. How girly. ๐Ÿ™‚
Front view of the towel duckie.
Feathers-up diving duckie. Some of these pics were obviously before I went back and added the bubbles. BTW, that’s a life preserver in the bottom left corner. ๐Ÿ™‚
Another pre-bubble shot. I really think the bubbles pulled it all together in the end. But you can get a good view of the fondant boat with this one.
Close-up of my fondant faucet works. Dark gray fondant was dry-painted with light silver-colored edible petal dust. That’s a red washcloth in the foreground.
Cupcakes. The ones topped with life preservers are homemade strawberry cupcakes and the duckie-topped ones are sour cream fudge cupcakes.
Duckie sugar cookies. I love these. They tasted great.
Cookie close-up.
The back side with little rolled towels and tile floor between drippy frosting “suds” and bubbles.
…And one more picture of the final product. My client let me know later that the cake had gone over so well they ran out early! I love getting feedback like that.